Japanese Cold Soba with Ribena Cordial Recipe!

Advertorial

12243591_525922984243229_5440216100739332789_n

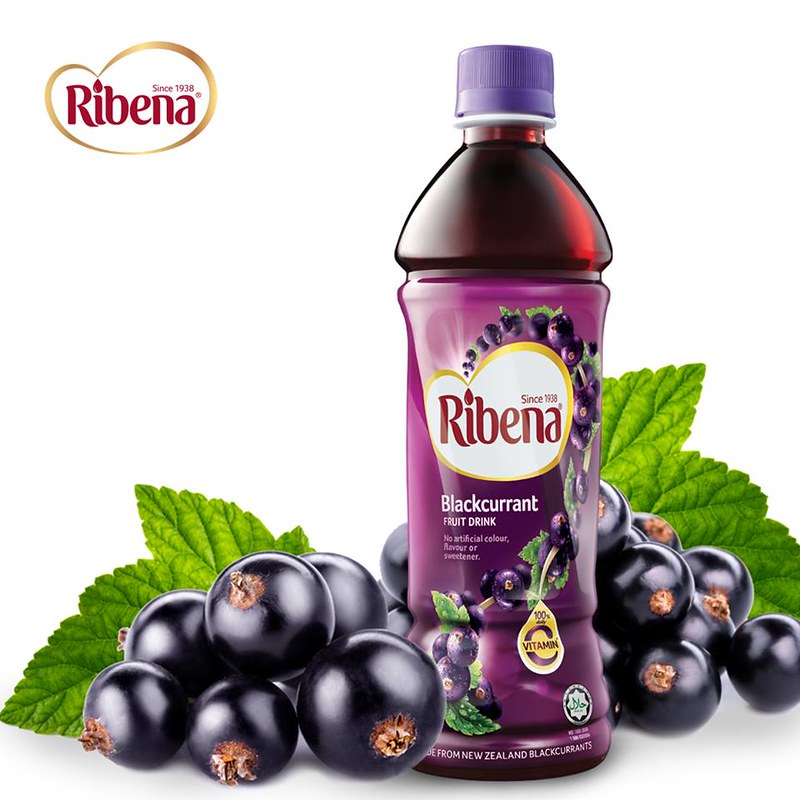
Photo credit: www.facebook.com/ribenasingapore

My mum used to be very strict about what goes into our mouths when we were younger. She would either scrutinise food labels or rely on her own judgement based on maternal instincts to determine if a particular food or drink could be included in her approved food list for children. Ribena is made with 100% Blackcurrants from New Zealand and is rich in Vitamin C, with no artificial flavouring, sweetner nor colouring. My mum felt so reassured by the benefits of Ribena that she gave us Ribena to drink on a regular basis and it soon became something that we would look forward to after school every day, especially when the weather was scorching hot!

We have introduced Ribena as a healthy drink to Little misschewy when she was about one year old and she loves it! Every now and then, she would request for a cup or packet of Ribena and we have absolutely no qualms about giving it to her after her meals. Do you know that each 200ml glass of Ribena drink provides a child’s daily Vitamin C requirements? If you find that Ribena is too sweet, it is actually not! The sweetness level of Ribena Cordial can be adjusted to suit your personal preference. As for me, I love mixing Ribena Cordial with chilled green tea!

A32A7428

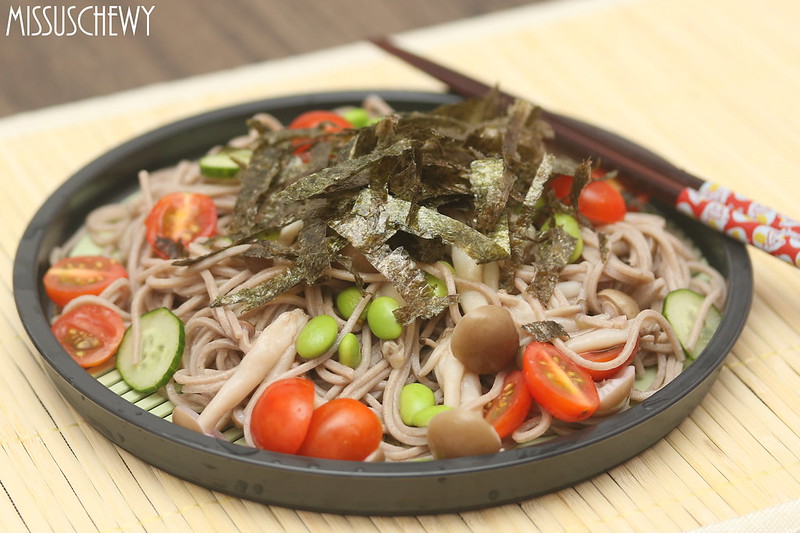
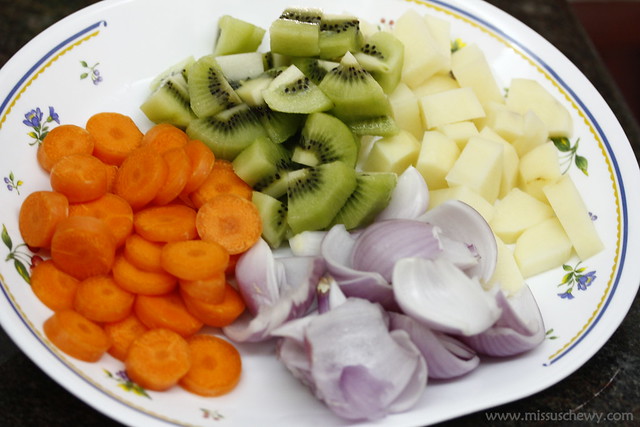
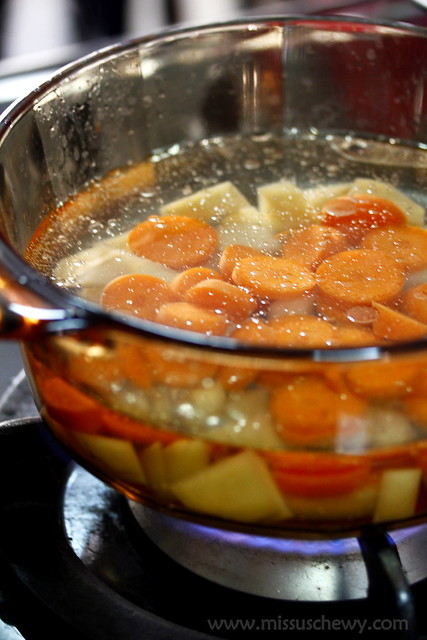
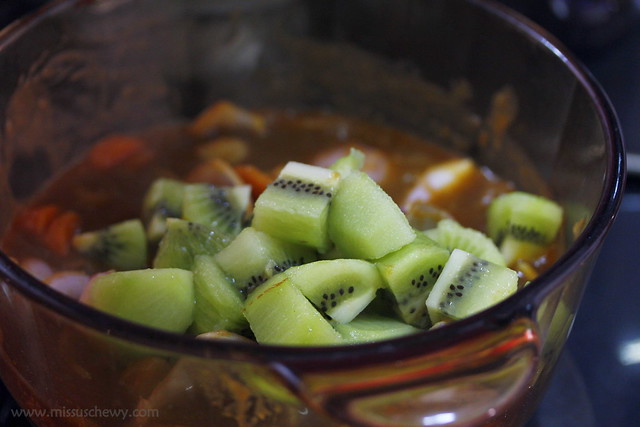
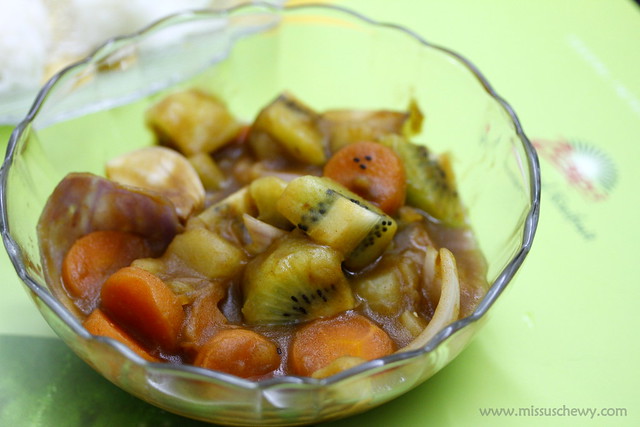
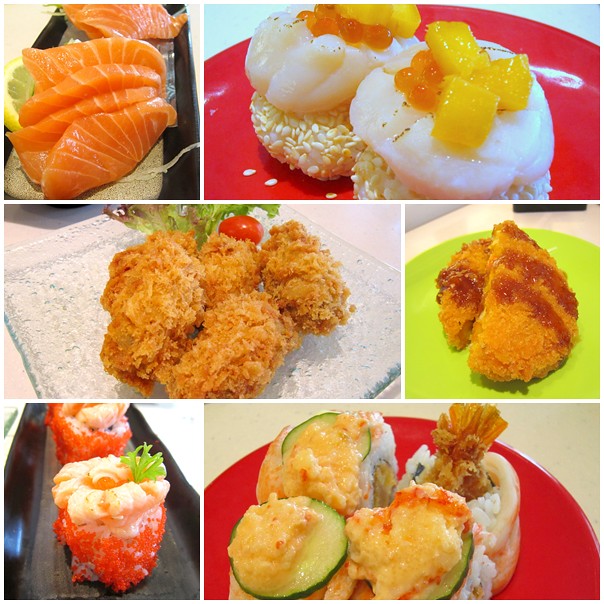
Interestingly, one can get creative with Ribena Cordial as it can also be used as an ingredient for simple dishes, desserts and beverages. Over the long weekend, I felt like eating clean and decided to whip up a dish of Japanese cold soba noodles, topped with all of my favourite ingredients! This dish is fuss-free and very easy to execute, even for a noob cook like me. Basically, you only need to boil everything! How you want your noodles to taste depends on the sauce or dressing! I usually alternate between a savoury soba noodle dipping sauce and a fragrant roasted sesame dressing. This time, I wanted something light and refreshing! Ribena Cordial came into the picture and the result was fantabulous!

Ingredients:

Buckwheat soba noodles
Shimeji mushrooms
Honey tomatoes
Japanese cucumber
Frozen Edamame soybeans
Dried Seaweed strips
Large bowl of ice
Lemon
Ribena Cordial

A32A7351

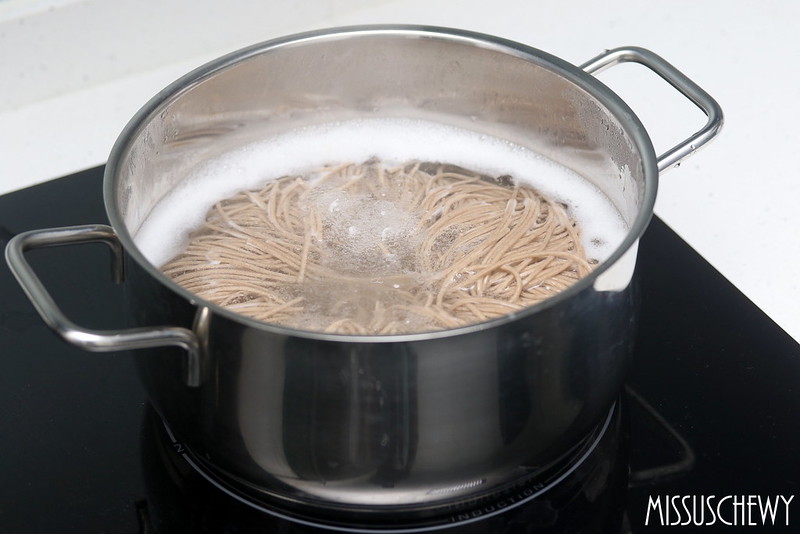
1. Boil buckwheat soba noodles at medium high to high heat for about 10 minutes.

A32A7360

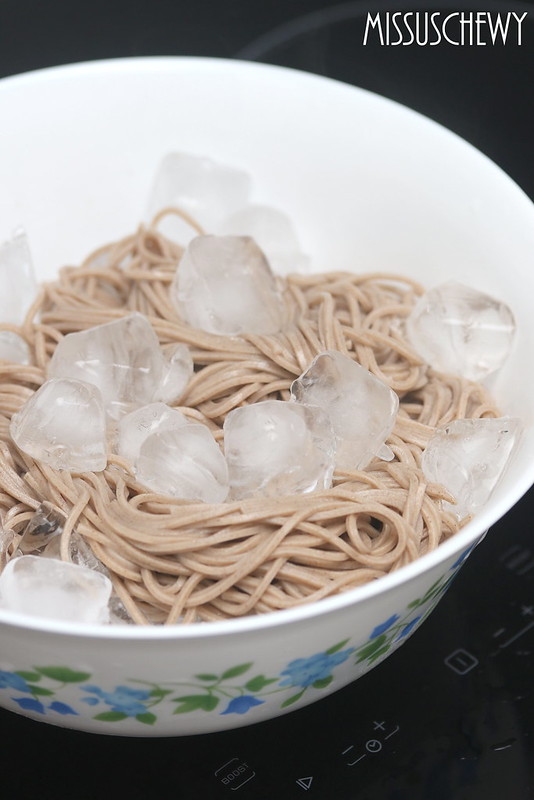
2. Have a large bowl of ice on standby and immediately transfer the boiled noodles over. This is to prevent the noodles from being slimy and sticky, and is also a great way to chill the noodles quickly. You may also pop the entire bowl of noodles and ice into the refrigerator.

A32A7383

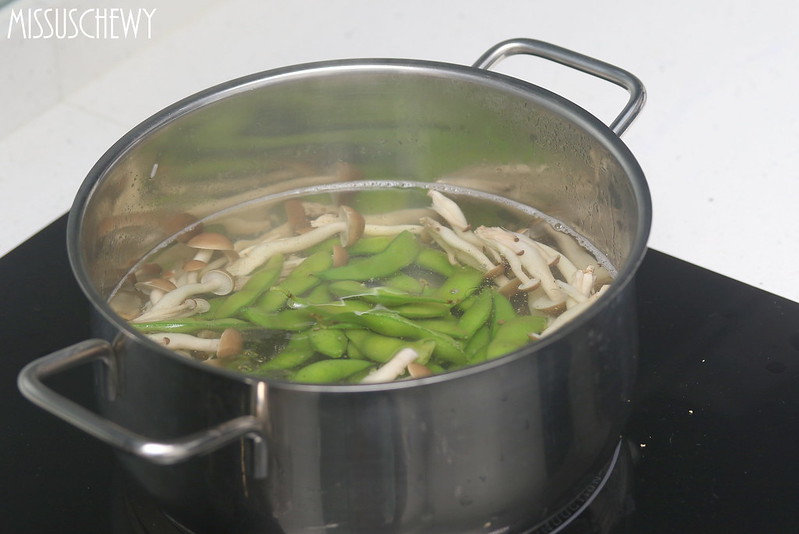
3. Boil Shimeji mushrooms and Edamame soybeans at high heat for about 5 to 8 minutes.

A32A7393

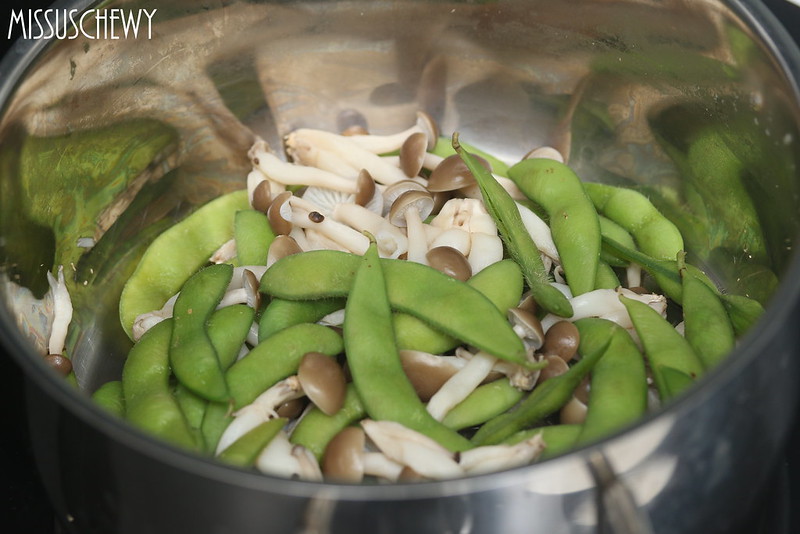
4. Drain away the boiled water. Leave Shimeji mushrooms and Edamame soybeans to cool.

A32A7398

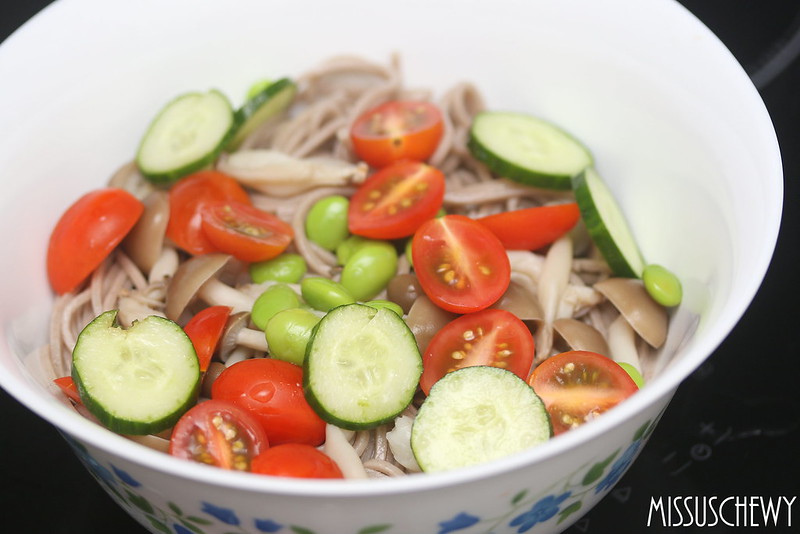
5. Combine chilled noodles, mushrooms, edamame, cucumbers and tomatoes in a bowl.

A32A7403

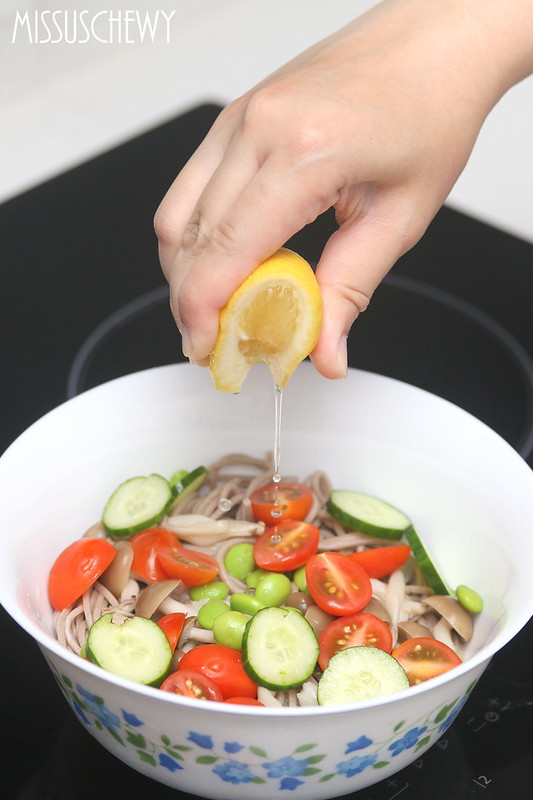
6. Squeeze half a lemon into the bowl.

A32A7412-horz

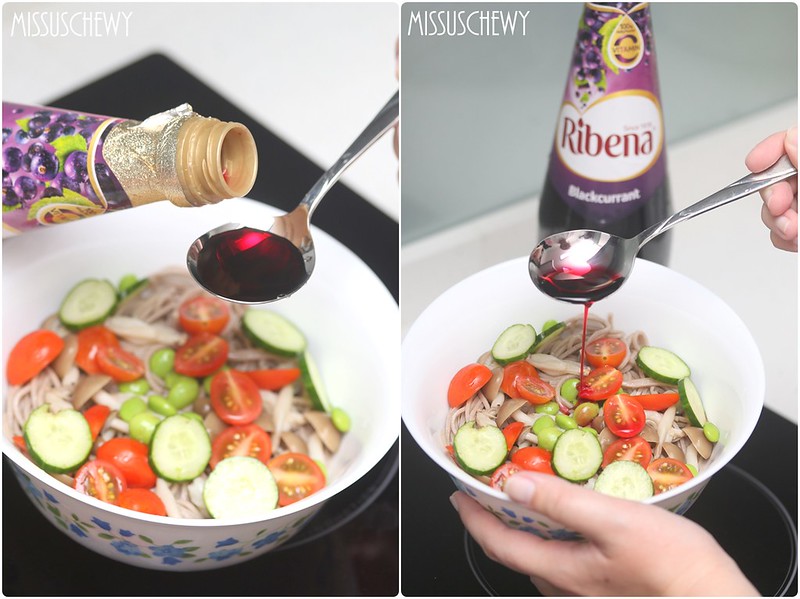
7. Pour in two tablespoons of Ribena Cordial.

A32A7420

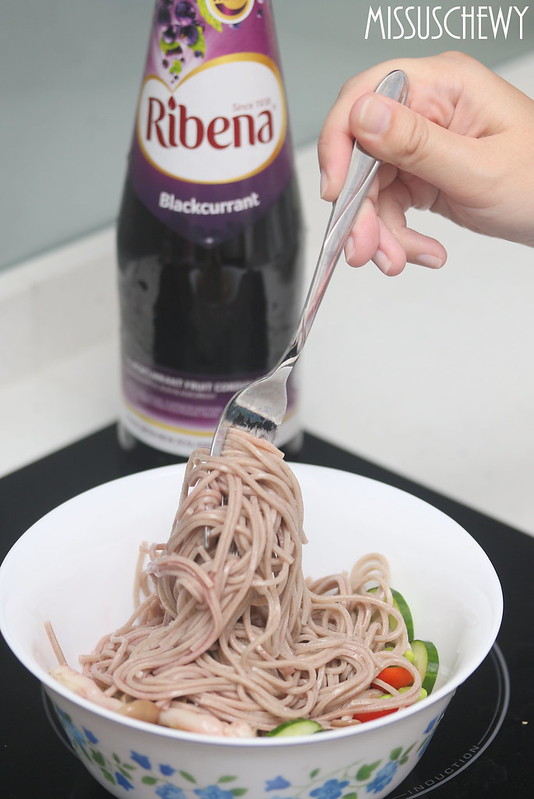
8. Stir noodles and ingredients well.

A32A7435

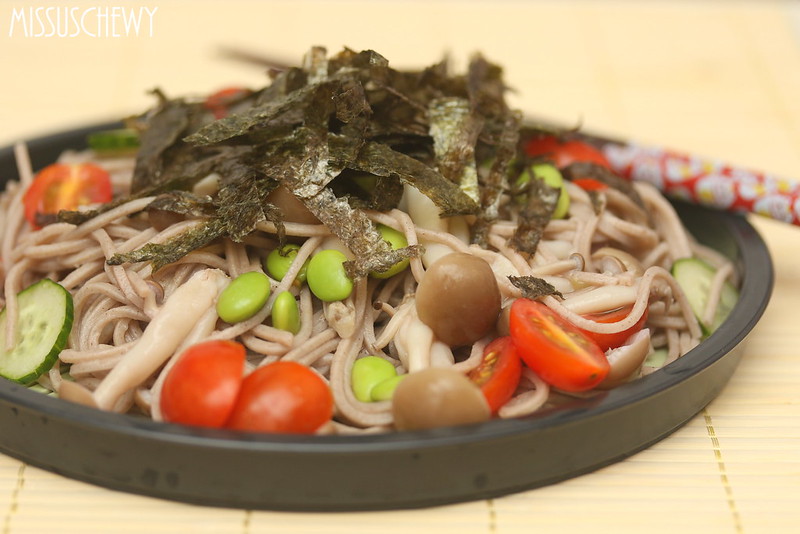
9. Garnish with dried Seaweed strips and serve!

A32A7444-001

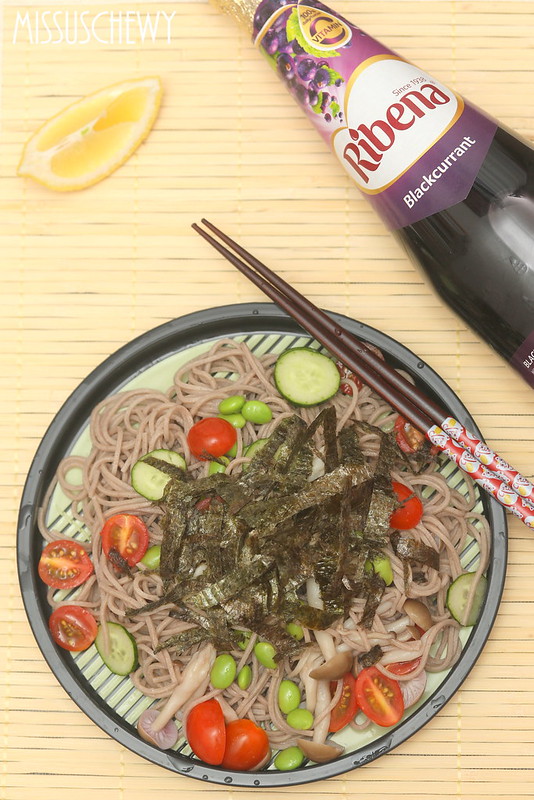
This plate of Japanese cold soba noodles turned out exactly the way I wanted it to be! It tasted light, tangy and a little sweet, which is definitely a perfect refreshing meal on a hot day! Bonus? I got my dose of Vitamin C! If you have tried any recipes with Ribena Cordial, please share them with me!

Get a free jug with every purchase of a 1 litre bottle of Ribena Cordial today! Like Ribena Singapore’s Facebook page https://facebook.com/ribenasingapore to stay updated on latest promotions!

Double-boiled ZESPRI Kiwifruit with White Fungus!

_MG_7713

After two consecutive days of posting simple recipes of Seafood Fried Rice with ZESPRI Kiwifruit and Japanese Vegetable Curry Rice with ZESPRI Kiwifruit, I will be doing short post on making Double-boiled ZESPRI Kiwifruit with White Fungus!

_MG_7725

Ingredients
– White fungus
– Wolfberries
– Red dates
– Rock sugar
– Pear
– ZESPRI Green Kiwifruit

_MG_7726

Add all the ingredients into the double-boiler and double boil over simmering water in a pot for about an hour.

_MG_7730

It’s so simple! You can choose to leave the double-boiler to cool before refrigerating it for a few hours prior to serving.

_MG_7731

Don’t forget to visit ZESPRI’s website for really cool dessert recipes!

Infographic 2

Did you know that ZESPRI Green Kiwifruit has FIVE times the nutrition of apples? It is also an extremely rich source of Vitamin C! Hope this little fun fact helps to chase those Monday blues away ๐Ÿ˜‰

Japanese Vegetable Curry Rice with ZESPRI Kiwifruit!

ZESPRI Kiwifruit Japanese Curry 004

Happy Sunday everyone! Yesterday, I shared a very simple recipe for Seafood Fried Rice for ZESPRI Kiwifruit and today, I will be blogging about Japanese Vegetable Curry Rice with ZESPRI kiwifruit! Yup, you heard me right! I posted a photo of the final product on Instagram and it seemed like not many could get used to the idea of eating kiwi with curry ๐Ÿ˜›

Ingredients
– Japanese Vegetable Curry
– Onion
– Potato
– Carrots
– ZESPRI Green Kiwifruits

ZESPRI Kiwifruit Japanese Curry 007

Slice/chop carrots, potato, onion and kiwifruits.

ZESPRI Kiwifruit Japanese Curry 011

Boil water and add a dash of salt and cooking oil. Boil carrots and potato for a few minutes.

ZESPRI Kiwifruit Japanese Curry 016

Drain away the water. Add Japanese vegetable curry and onion. Stir well.

ZESPRI Kiwifruit Japanese Curry 020

Add ZESPRI green kiwifruits and stir.

ZESPRI Kiwifruit Japanese Curry 021

ZESPRI Kiwifruit Japanese Curry 032

Here’s our Japanese vegetable curry rice with ZESPRI kiwifruit! You can choose to serve it separately from your steamed white rice. It’s really very simple to cook! ๐Ÿ™‚

ZESPRI Kiwifruit Japanese Curry 043

Itadakimasu~ I personally like to mix the Japanese curry into my rice before eating. Anyway, this is a bit like assam sauce, minus the spiciness and sourness! Haha! For more recipes, visit ZESPRI’s website.

Seafood Fried Rice with ZESPRI Kiwifruit!

_MG_7640

How do you get creative when you have boxes and boxes of ZESPRI kiwifruits? On National Day, my mum and I whipped up a storm in the kitchen. Ok, my mum did the cooking while I stood there photographing the entire process ๐Ÿ˜› I’m gonna share a very simple recipe on Seafood Fried Rice with ZESPRI Kiwifruit today!

Ingredients
– Squid
– Crabmeat stick
– Prawns
– Eggs
– Steamed white rice
– Garlic
– Chicken stock
– ZESPRI Gold Kiwifruits

Quantity wise, I leave it all up to you! You can always add in more of the ingredients that you like ๐Ÿ˜›

_MG_7649

Turn on stove and heat up the wok. Add a bit of cooking oil and fry in some garlic. As it sizzles, add prawns, squid and crabmeat stick. Give it a good fry!

_MG_7651

For extra flavor, add in a dash of chicken stock.

_MG_7653

Pour in steamed white rice.

_MG_7660

Continue frying. Don’t forget to watch the fire and adjust accordingly to prevent burning the rice!

_MG_7663

Lightly beat eggs and pour them in. Stir till they are lightly scrambled.

_MG_7669

Now for the fun part! Add in diced ZESPRI kiwifruits and stir minimally.

_MG_7672

Wheeeeee! Our seafood fried rice with ZESPRI kiwifruit is ready! How does it taste? Surprisingly, it tastes quite good! A bit like pineapple fried rice! ๐Ÿ˜‰ Head to ZESPRI’s website to learn more about their recipes using ZESPRI kiwifruits!

Cook For Family: Power Packed Porridge with Cuttlefish, Fishcake, Chicken, Scallop & Peanuts

Cook For Family - Porridge

I have decided to jump on the Cook For Family bandwagon together with over 100 bloggers. Basically, this initiative promotes cooking for our family members. Those who know me would know that missuschewy does not cook. At all. You will never find her in the kitchen. Except when she raids the refrigerator of course.

Cook For Family 002

The whole idea of cooking for my family members does sound kinda fun and meaningful but let’s face it, I can only cook something simple and fuss-free. I thought of my favorite porridge that my mum makes every now and then. It’s something that I can eat for breakfast, lunch or dinner. True story! With that, my mum became my ‘Power Packed Porridge Consultant’. The porridge is ‘power packed’ because it has lotsa ingredients in it! There are slices of fried fish cake, cuttlefish, chicken fillet, scallops and peanuts.

Cook For Family 005

Cook For Family 006

Cook For Family 019

Preparation is very simple but I will still run through the process briefly over here. Shred chicken, fishcake and cuttlefish into slices. Marinate chicken fillet in sesame oil, oyster sauce and pepper.

Cook For Family 029

Soak rice grains with dried scallops in water for at least one hour.

Cook For Family 030

Boil half a kettle of hot water. Add boiled water into the slow cooker. Turn cooker to high heat.

Cook For Family 031

Half an hour later, add chicken fillet. Let it cook for another half an hour before adding cuttlefish and fishcake. Turn to low heat and let it simmer for one hour. Add hot water and stir when necessary. Finally, pour the whole can of peanuts into the pot. Don’t let the peanut sauce in the can go to waste. Pour it in too! It adds a sweet flavor to the porridge.

Cook For Family 046

Garnish the bowl of porridge with chopped spring onion and fried shallots. And tadaaaah~! That’s a bowl of power packed porridge for you!

Cook For Family 048

It’s a success! The porridge has a very nice sweet flavor and its texture is soft. Use only a slow cooker to cook the porridge!

Cook For Family 052

Glad to be part of this Cook For Family initiative! ๐Ÿ™‚

Pandan Kaya Cake Baking Lesson with Colleagues!

IMG_1201

Cheers! It’s Monday! Hahaha ok who are we kidding here? ๐Ÿ˜› Anyway, we had a department lunch followed by a baking session quite sometime back! We do this lunch and teambuilding thing twice a year, on the company’s budget. Half day off work somemore! ๐Ÿ˜€ As soon as it was 12pm, all hell broke loose. Haha just kidding!

IMG_1196

We travelled to Heartland Mall Kovan on two separate four-wheeled vehicle because we have a fairly large group. Eve’s son is placed in the childcare within our company building so she took him along as well ๐Ÿ˜€

IMG_1190

Hao Hao was a little shy at first.. And I guess he was wondering “Why is this jie jie taking a photo of me?!”

IMG_1194

But he slowly warmed up to us when we started ‘playing’ with the touchscreen menu with him. Haha he’s really very cute! ๐Ÿ˜€

page

When another colleague, Angel, made reservations, she was told that we would be getting 2 tables. In the end, our tables were given to others and we had to split up in small groups of three by the conveyor belt. Here are some of the items we shared!

IMG_1209

Hao Hao and his kids’ bento!

IMG_1212

IMG_1214

Haha he’s engrossed with playing Mummy Eve’s phone.

IMG_1218

After lunch, it was time for our baking lesson! Wheeeee!

IMG_1219

“Ahhhhh! Mummy! I don’t want to take photo with this jie jie la!”

IMG_1217

Irene runs BakeAvenue, which allows people to pick up baking skills in a conducive home-based environment.

IMG_1226

We were first taught how to bake Pandan Kaya Cake! Yup it’s like the one you can find at Bengawan Solo.

IMG_1232

Ingredients
For cake:
– 250g Optima Flour
– 4 Eggs
– 75ml Pandan Juice
– 1/2 tbsp Green Coloring
– 100ml Thick Coconut Milk
– Desiccated Coconut

For Kaya:
– 800ml Coconut
– 125g Sugar
– 30g Hoon Kueh Flour
– 30g Corn Flour
– 1/2 tbsp Instant Jelly
– 2 tbsp Pandan Juice
– 1/2 tbsp Green Coloring

IMG_1228

We had to oil our cake tins with butter before lining them with baking parchment.

IMG_1230

IMG_1233

Beat eggs, optima flour, pandan juice and green coloring together at high speed for 10 minutes or till thick. Use hand to fold in the coconut milk.

IMG_1239

Ready to place in the oven!

IMG_1240

IMG_1241

Bake at 175 degrees celcius.

IMG_1245

IMG_1258

IMG_1251

IMG_1249

IMG_1257

IMG_1261

IMG_1262

We had to take the cake out from the tin and leave it to cool.

IMG_1263

In the meantime, boil half of the coconut milk with sugar. Mix the other half with hoon kueh flour and corn flour, then pour in the first half. Add in instant jelly, pandan juice and green coloring. Stir till kaya is thick.

IMG_1266

Slice the horizontal cross section of the cake from the side. Put the bottom layer of the cake into the tin and spread kaya over the cake. Place the top layer and spread kaya. Put aside to set and chill.

IMG_1270

IMG_1284

When cake is ready to be served, take it out from the tin and coat with desiccated coconut around the cake.

IMG_1243

While Mummy Eve was busy with her cake, Hao Hao was occupied with his own task too. Punching out various cookie designs with the dough puncher!

IMG_1254

Hao Hao then had to sprinkle rainbow bits all over the cookie dough.

IMG_1255

IMG_1252

IMG_1272

HAHAHA! This time, Hao Hao’s expression says it all. “OMG! This jie jie keeps taking photos with me! And now she’s grabbing me by the waist! :O ” LOL!

IMG_1280

Moving on, it was time for us to bake Fresh Grated Coconut Steamed Cake.

Ingredients
– 125g Hong Kong flour
– 2 Eggs
– 125g Sugar
– 1/2 tbsp Ovalett (Sponge Gel)
– 1/2 tbsp Baking Powder
– 1 tbsp Pandan Juice
– 1/4 tbsp Green Coloring
– 100ml Thick Coconut Milk
– 250g Grated Skinned Coconut

IMG_1282

Beat eggs, ovalett, pandan juice and sugar for about 7-8 minutes. Slowly add in coconut milk, then Hong Kong flour. Add a little corn flour to the grated skinned coconut before arranging into moulds, then pour the mixture into it.

IMG_1286

Steam for about 10 minutes.

IMG_1290

Look! Totally amazing! Love how it tasted!

IMG_1278

And this is Hao Hao’s masterpiece! His cookies are ready for consumption!

IMG_1276

IMG_1294

One of our colleagues is a vegetarian, so Irene taught her how to bake eggless cereal cookies.

IMG_1291

I’m glad I brought along misterchewy’s Canon IXUS instead because it was very difficult to manage a huge camera given the circumstances. Everyone was happily eating and drinking tea after the baking session! ๐Ÿ˜€

IMG_1296

The baking lesson was kinda fast-paced but we all had a really good bonding session! Looking forward to the next department lunch and teambuilding activity at the end of the year! ๐Ÿ˜€ ๐Ÿ˜€ ๐Ÿ˜€

Cook Your Very Own Curry La Mian with Prima Taste!

_MG_4457

One lazy Sunday afternoon, the Chewys decided to stay at home and whip up a simple meal in the kitchen. Usually we would choose to eat out because the thought of having to cook and then wash up afterwards is quite scary. We were given the opportunity to sample Prima Taste’s Curry La Mian quite some time back but we never got round to doing it. To be honest, I will never forget the tasty Laksa noodles that we had at Prima Taste Kitchen last year. The noodles were premium steam dried and are not those deep fried noodles that u can get in your typical pack of instant noodles.

_MG_4474

Before I embarked on my mission, the missus proclaimed that she wanted to have a hard boiled egg to go along with her noodles so here’s one for each of us.

_MG_4480

I followed the instructions stated on the pack closely! Rule of thumb: Do not add too much water if not the curry will end up too watery.

_MG_4498

_MG_4503

Pour in the Curry Paste first.

_MG_4511

Followed by the Curry Premix.

_MG_4513

At this point, it smelled heavenly already!

_MG_4516

_MG_4490

Depends on personal preference. I tend to peel the hard boiled eggs while waiting for the noodles to be cooked.

_MG_4497

The missus and I decided to add crabmeat sticks and chicken meatballs too.

_MG_4528

_MG_4555

And here is The Chewys’ very own Prima Taste Curry La Mian! Does it look appetising? The curry gravy was intense with flavors and very lemak too! Of course, the missus kept silent throughout as she tucked in hungrily into her bowl of noodles and this served as a form of reaffirmation that Prima Taste’s Curry La Mian is something that everyone can easily cook in the comfort of their own kitchens!

Thank you Prima Taste and Ruby from Foreword Communications for the Curry La Mian.

Udders Ice Cream Making Workshop & Buffet with Colleagues!

_MG_4179

My company’s recreation committee is always organizing fun events and recently, there was one which caught my attention because it involves food! Ok la I was keen to learn how to make ice cream. In case you’re wondering, we paid a discounted price to attend the Udders ice cream making workshop, inclusive of an ice cream buffet after that!

_MG_4180

_MG_4167

_MG_4171

Angel & Charlene self-shot

Here’s a self-shot of me and the organizer of the event, Angel! Ok all photos from this point onwards were taken using misterchewy’s Canon IXUS point and shoot because there wasn’t space on the table for me to place my dslr on.

Trainer Introduction

Everyone listened attentively as the ice cream trainer started his short introduction. LOL we did some warming up handshake exercises which were kinda hilarious which got some of the ladies squealing with laughter before he started the session proper.

Ingredients

Before all of us got down to business, we were given 3 flavors to choose from – vanilla, chocolate and coconut. I wanted to try something slightly different and decided on making coconut ice cream! ๐Ÿ˜€ Majority chose chocolate and the trainer remarked that he has observed, after conducting numerous workshops, that “the chocolate people are a little bit different.. they don’t listen to instructions.” HAHA!

Pouring in coconut milk

The first step was simple. Pour in 200ml of milk and 200ml of coconut cream into the metal bowl. This recipe is enough for 2 portions.

Stirring the contents

Add in 50g of sugar and stir well!

Mixture of coconut milk and sugar

After you are done with the stirring, bag the mixture! Use a ziplock bag please, remove as much air as possible and seal it properly. Don’t ask me how to remove air from the bag. LOL.

Bag of ice

Have a bag of ice ready!

Salt and Ice

Put in 6 heaped tablespoons of coarse salt into the bag of ice in order to lower its temperature to -22 degrees celsius after a good shake!

Colleagues making ice cream

Once you are done with mixing the salt with the ice, put the small ziplock bag (containing the mixture) into the ziplock bag. Do not pour the contents from the small bag into the big bag!!

Wrapped with good morning towel

Close the big ziplock bag and wrap it with a medium sized towel so that your hands won’t be frozen. A Good Morning towel would be ideal. Hahaha.

Shaking the ice

Gently massage the big ziplock bag! The ice cream in the small ziplock bag will slowly begin to harden as it gets colder. When it is hard enough, your ice cream is ready! ๐Ÿ˜€ ๐Ÿ˜€ ๐Ÿ˜€

Having fun

We had to shake/massage the bag of ice for about 10 minutes and this is what happened.. Colleagues started giving one another massages on the back! LOL!

Angel and vanilla ice cream

Tadah! Angel and her vanilla ice cream!

Angel and Charlene

So excited man! My coconut ice cream is ready too!

Before eating coconut ice cream

So here’s a “Before” shot!

Damn awesome coconut ice cream

Hahaha and an “After” shot! I can’t believe the coconut ice cream that I made tastes really like coconut ice cream! HAHA! So happy I wanna cry!

Coconut Ice Cream

Group after making ice cream

As you can see, ice cream making is very popular with the ladies!

Charlene & Amy

Time for ice cream buffet! *Screams* Ok la I know we very kiasu. Other people still eating their own ice cream we chiong to the ice cream counter instead ๐Ÿ˜› Mai lugi! LOL. That’s me and Amy!

Ice Cream on Waffle

Four non-alcholic ice cream flavors first! Green tea, Horlicks, and I can’t remember the other two. I didn’t eat these on my own la. Shared with Angel! Got waffle somemore! Shiok!

Charlene ice cream buffet

Charlene & Angel ice cream buffet

Alcoholic Ice Cream

And then we had another 4 scoops of ice cream. Alcholic flavors this time!

Amy, Angel, Charlene

Whoohoo! We totally enjoyed this ice cream making workshop and buffet! Looking forward to more exciting events organized by the committee! ๐Ÿ˜€ ๐Ÿ˜€ ๐Ÿ˜€

_MG_4203

After the session, I whiled my time in United Square, more specifically at an empty table outside Texas Chicken, where I updated one of my blog posts on the iPad. Met misterchewy in the evening and went to the BBQ organized by his colleagues! Second time joining them. I think there’s another one coming right up in June. Lol.

_MG_4200

_MG_4204

Hehe of course there’s more than just otah but I was lazy to take photos la ๐Ÿ˜›

_MG_4207

_MG_4193

_MG_4218

Take care everyone! Till the next post! ๐Ÿ™‚

YIFON Bottled Mushrooms Cooking Session with Chef Eric Teo!

382817_268061729918707_250922864965927_820157_1928517299_n
Photo credit: Irwin Tan

Many weeks ago (*ahem*), I was invited to a cooking demonstration with the use of YIFON food products by Chef Eric Teo. Of course, there were some hands-on which heightened my interest in this event as I have not been able to whip up a proper meal all by myself. Secondary school home economics class not counted right? Got partner leh. FYI, my partner did the cooking and I did the washing. Well, I can cook plain rice and noodles though. After all, it’s just boiling water and throwing stuff in right? Haha.

_MG_9355

It was my first time meeting Chef Eric up close and personal. I heard that he has been termed an ‘auntie killer’ for being very popular with many aunties because he’s full of charm and charisma. Haha I wasn’t killed because I’m not an auntie ๐Ÿ˜›

376993_268061386585408_250922864965927_820149_560273121_n
Photo credit: Irwin Tan

Ok la but I have to admit that Chef Eric is indeed very charming and managed to humour us ladies ๐Ÿ˜›

383817_268062373251976_250922864965927_820166_1073920050_n
Photo credit: Irwin Tan

Do you know that YIFON’s high-quality bottle mushrooms can be eaten straight from the bottle? How convenient is that?! With absolutely no cooking required, you can eat them on their own, complement them with rice, porridge or noodles or use them as ingredients to create delightful dishes like those Chef Eric demonstrated! YIFON bottled mushrooms are available in a delectable range of five different mushrooms in six different flavors.

383681_268070573251156_250922864965927_820226_514676509_n
Photo credit: Irwin Tan

And what do we do when the final product is done? We start shooting of course! ๐Ÿ˜›

_MG_9374

We started off with XO King Scallop with Spicy Golden Mushrooms & Crispy Rice Crackers, which was the most complex dish, at least it is to me. Oil was splattering everywhere when I was pan-frying the scallops!

Recipe (serves 2)
Ingredients
1 Bottle – YIFON Spicy Golden Mushrooms, drained
6 pieces – King Scallops
6 pieces – Rice Crackers, deep fried
1 tbsp – XO Sauce
1 stalk – Spring Onions, sliced
1 piece – Red Chili, diced
1/4 tsp – Sesame Oil
Method
1. Heat up wok over medium to high heat with oil.
2. Pan-fry scallops for 30 seconds on each side, add XO sauce and toss well.
3. Separately, mix YIFON Spicy Mushrooms with chilli and sesame oil.
4. Assemble YIFON Spicy Mushrooms with scallops and rice crackers, sprinkle with spring onions and serve.

391941_268070003251213_250922864965927_820218_301414697_n
Photo credit: Irwin Tan

Ya lah excuse me, you think what? First time fry scallop so nice meh? The previous dish wasn’t mine! It was Maureen’s. Mine is too ugly. Even Chef Eric say “Got room for improvement!” T_T Here I am with my king scallop! Hey, I didn’t score points for presentation but it was quite yummy! I like the YIFON spicy golden mushroom already! ๐Ÿ˜€

_MG_9397

The Pork Luncheon Meat Bruchetta is slightly easier to prepare. First, we had to slice the luncheon meat. If you like luncheon meat, slice it thick. If you don’t, then slice as thinly as possible. Simple. I loveeeeee Maling luncheon meat and have been eating it since young! Didn’t know that it’s part of the YIFON family. Tell you a secret. I forgot to turn on the fire and Maureen stopped me in time when she saw me tilting the bottle of oil above the frying pan. Lol!

Recipe (serves 2)
Ingredients
1 Can – MaLing Pork Luncheon Meat
1 Roll – French Baguette, sliced
4 – Quail Eggs, hard-boiled and halved
30g – Red Cherry Tomatoes, halved
30g – Shallot, sliced
20g – Sweet Basil Leaves
30g – Pineapples, diced
Seasonings
2 tbsp – Olive Oil
1 pinch – Black Crushed Pepper
1 pinch – Salt
Method
1. Slice MaLing Pork Luncheon Meat into 4″ by 2″. Pan-fry until both sides are crisp and brown. Set aside
2. Toast sliced baguettes for 3 minutes.
3. Mix hard-boiled eggs, pineapples, tomatoes, sweet basil leaves, shallots and seasoning.
4. Top toasted baguette with luncheon meat and above mixture. Serve.

_MG_9403

Saving the best (and easiest) for the last! Do you know that our pizza tasted really delicious and finger lickin’ good with YIFON assorted mushrooms?

Recipe (serves 2)
Ingredients
1 Bottle – YIFON Assorted Mushrooms, drained
2 pieces – Pizza Crust
3 tbsp – Tomato Sauce
10g – Red Onions, diced
30g – Turkey Ham
5g – Salad Leaves
1/4 tsp – Olive Oil
1 pinch – Salt
1 pinch – Pepper
Method
1. Pre-heat oven to 180 degree, bake pizza crust for 3 minutes. The pizza crust should be golden brown but soft in the center.
2. Spread tomato sauce evenly. Top with YIFON Assorted Mushrooms, salad leaves, ham and cheese.
3. Drizzle olive oil, salt and pepper. Bake for another 5 minutes then serve hot.

379906_268074443250769_250922864965927_820279_1365656566_n

Maureen and I were excited over our pizzas! Wanna guess what misterchewy had for dinner when he returned home from work that night? ๐Ÿ˜›

382776_268074496584097_250922864965927_820280_1621324462_n

Thank you Chef Eric and Yifon for the kind invitation.

Bloggers’ Makan Session: He Cooked, We Snapped, Ate & Loved It!

Bloggers Makan Session

It was quite sometime ago when Jacob from Cook.Snap.Eat.Love tweeted if anyone of us would be keen on a makan session at his place. I follow Jacob’s blog very closely and have always marvelled at his culinary skills! I was very sure that he wanted to whip up something in his kitchen and indeed, he had that plan in mind. Jacob grows his own microgreens as seen in the above photo and used some to garnish the soup we had for dinner! Interesting, isn’t it? ๐Ÿ™‚

page

Since misterchewy and I were the earliest (we reached on the dot while the rest were late!) we sneaked into Jacob’s kitchen and caught him when he was cooking the duck confit. In fact, he started preparations the week before! Don’t ask me how he did it but he did it. Oops sorry a bit of a spoiler there! Jacob’s girlfriend, Chloe, made these pretty Ispahan dessert for us! ๐Ÿ˜€ ๐Ÿ˜€ ๐Ÿ˜€

_MG_5582-1

            Entrรฉe – Cream of Mushroom Soup

First on the three course menu was Cream of Mushroom Soup. All of us oohed and ahhed over it, no kidding! What a superb starter it was! Jacob used a great variety of mushrooms but I can’t remember how many different types went in there. Portobello mushrooms, blue oyster mushrooms, button mushrooms and shitake were some! The texture of the soup was like that of puree – thick, creamy and chunky. I enjoyed every bit of it and it was a delight to not only be able to drink but ‘eat’ my soup at the same time!

_MG_5607

            Main Course – Duck Confit

Cooking duck confit is a major project and it’s seriously an uphill task that not just any Tom, Dick or Harry can handle. Jacob got worried when all of us became quiet but that’s because we were too engrossed in eating! The skin of the duck was crispy and the meat was quite fork tender. I would consider Jacob’s version of duck confit to be somewhat leaner than those that I have tried.

_MG_5619

          Dessert – Ispahan

Hardcore dessert and pastry lovers would know who Pierre Hermรฉ is. The Ispahan is one of his signature creations, and it’s really delicate and exquisite. In shades of soft pink and red, complete with raspberries and a rose petal on top, this pastry is too dainty to be eaten. Crisp chewy macarons sandwiching a layer of raspberries on smooth rose buttercream, with a lychee in the center constitute the Ispahan. Chloe sure has potential! She was also thoughtful enough to make her Ispahan less sweet to suit Singaporean tastebuds.

Group Photo
Photo credit: Jacob

It was another awesome gathering with the bloggers. Fantastic food and lovely company I would say! ๐Ÿ™‚ Oh did I mention that misterchewy and I had another dinner to celebrate my grandpa’s birthday right after this? Hehe ๐Ÿ˜›